

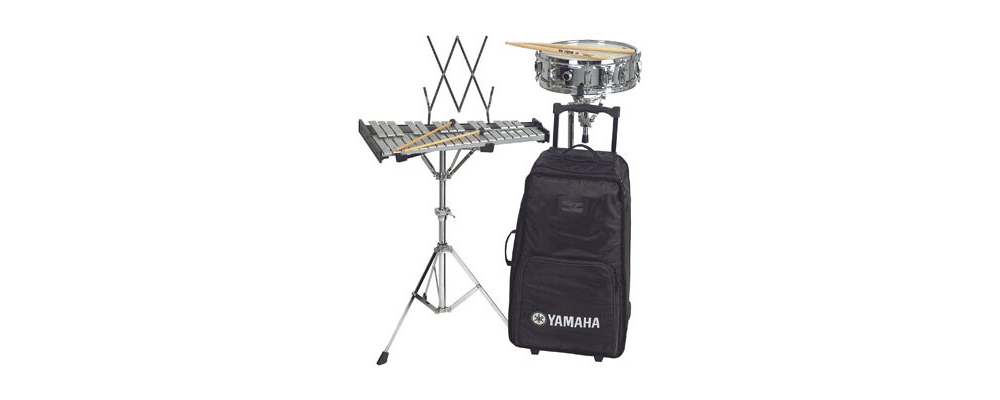
Congratulations on choosing to play percussion! Percussionists play some of the most dynamic and exciting pieces of a musical performance. Percussion instruments range from enormous bass drums to tiny finger cymbals, but the three most common percussion instruments in beginning school bands and orchestras are the snare drum, bells, and xylophone.
As a music student, or a parent of a music student, you will want to know some basics about your percussion instrument as soon as you start playing.
Keyboard (Mallet) Percussion
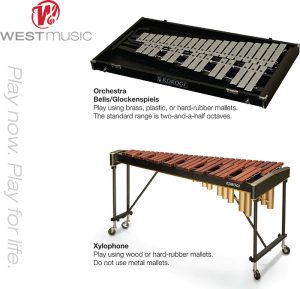
The keyboard percussion family (also called the mallet percussion family) includes orchestral bells, and chimes. Each instrument is arranged chromatically in two rows similar to a piano keyboard. Because of the different materials used, each of these five instruments has its own unique sound. The two most common keyboard percussion instruments are the bells and xylophone.
Bells
Also called the Glockenspiel, orchestral bells are made from metal and produce a bright, charming sound. The instrument is played with hard-rubber mallets, or sometimes brass or plastic mallets.
Xylophone
The xylophone is a percussion instrument with wooden bars. Each bar is a different length, so they play different notes when struck. A full-sized xylophone will have resonators to help make each note last longer. However, most students use a desktop xylophone which is smaller and more portable, and therefore much more convenient.
Click the image to zoom in.
Video Introduction to Keyboard Percussions
Watch this video introduction by Alfred Music to keyboard percussions. Alfred Music is the publisher of the popular Sound Innovations method book series, designed to help young students learn to play.
[su_youtube url=”https://youtu.be/BFfIPWq6gwg” width=”360″ height=”240″]
Snare Drum
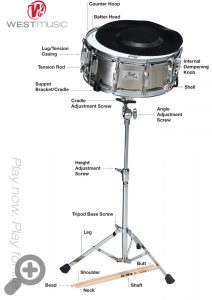
Parts of the Snare Drum & Stand
Click the image to zoom in.
Setting Up the Snare Drum
- Use the base screw (or wingnut) to loosen and tighten the legs on the stand. Open the stand wide enough to create a stable base for the instrument.
- Carefully place the drum on top of the stand, referred to as the “cradle.”
- Once securely in the cradle, tighten the wingnut at the bottom of the cradle until the stand has been tightened around the drum.
- Adjust the height of the stand to waist-high.
- Hold the drum as you adjust the angle of the stand. The drum should be parallel to the floor.
Below is a clip from Alfred Music, showing you these steps in more detail.
[su_youtube url=”https://youtu.be/EXCCS-Cu41Q” width=”360″ height=”240″]
Related Articles
- Percussion Techniques: How to Hold Your Drumsticks or Mallets
- 7 Tips for Practicing
- Practice Tips for Young Musicians
Have questions? Need advice? West Music is here for you! Give our school orchestra experts a call at 800-373-2000.
Adapted from Alfred Music’s Sound Innovations for Concert Band 1: Percussion.
Special thanks to our partners at Alfred Music for providing us smartmusic® videos and additional materials.
Aaron Hansen is an experienced K-6 General Music educator, passionate about bringing music to life through the Orff Approach. He holds both a Bachelor’s and a Master’s degree in Music Education from the University of Northern Iowa. Aaron has completed comprehensive Orff Teacher Training, including three levels at the University of St. Thomas and an Orff Master Class. His dedication to the Orff method took him to the Summer International Course at the Orff Institute in Salzburg, Austria. Aaron also shares his expertise by teaching movement at various Orff Teacher Training Courses and conducting workshops for local Orff Chapters.


